Mendota FV44i Manual: A Comprehensive Overview (03/26/2026)
This manual details the Mendota FV44i direct vent gas fireplace insert, offering installation, operation, and maintenance guidance. It covers safety, gas line sizing, and troubleshooting,
ensuring proper function and longevity of your heating appliance.
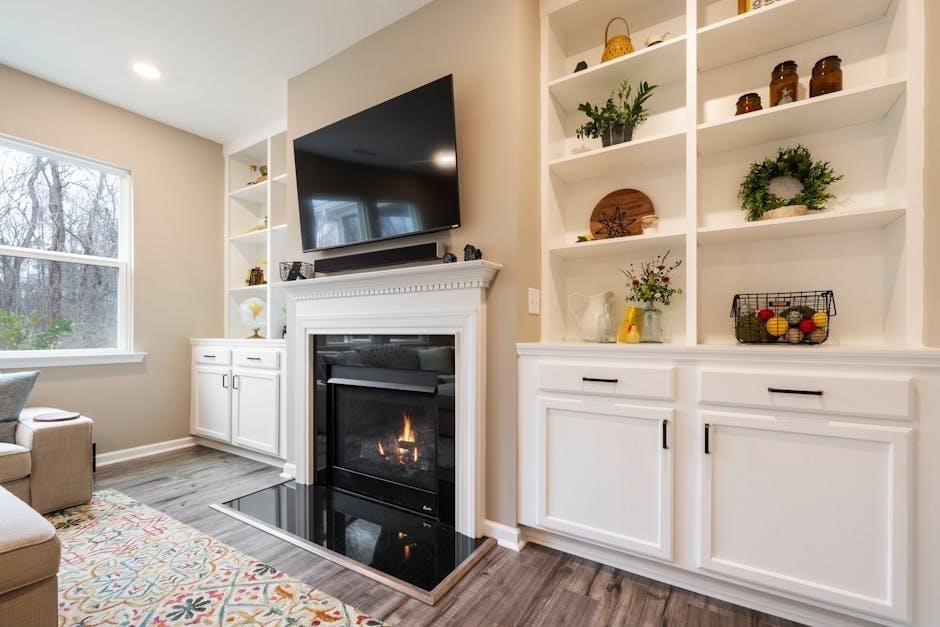
The Mendota FV44i is a high-definition combustion system designed as a direct vent gas fireplace insert. This appliance offers efficient and aesthetically pleasing heating for your home, utilizing a sophisticated system to maximize warmth and minimize emissions. This manual serves as a comprehensive guide for owners and service technicians, covering all aspects of the FV44i, from initial installation to routine maintenance and troubleshooting.
Understanding the intricacies of this system is crucial for safe and optimal performance. The FV44i boasts a robust design, but proper installation – including correct gas line sizing and venting – is paramount. This document details these procedures, alongside operational instructions and guidance on interpreting error codes. Remember, any safety screen removed for servicing must be replaced before operation, and a unit submerged in water should not be used.
This manual references parts lists and warranty qualifications, ensuring access to necessary components and understanding of your coverage.
Safety Precautions
Prior to installing or operating the Mendota FV44i, carefully review these critical safety precautions. Improper installation or operation can lead to fire, carbon monoxide poisoning, or personal injury. Always check for gas leaks after any gas line connection, utilizing a leak detection solution. Never operate the fireplace if any part has been underwater – it must be inspected and serviced by a qualified technician.
Ensure adequate ventilation and never obstruct the air intake or exhaust vents. Install proper size gas lines according to local codes and the manufacturer’s specifications. Any safety screen or guard removed for servicing must be replaced before operating the appliance. The burner must light immediately, with the flame traveling promptly around the curve to light the burner.
Regular inspection of the thermopile and pilot flame is essential for safe operation. Do not attempt repairs beyond your expertise; contact a qualified service professional.
Understanding the FV44i System
The Mendota FV44i is a direct vent gas fireplace insert featuring a High Definition Combustion System. This system draws combustion air directly from outside, eliminating the need for room air and enhancing efficiency. It operates using a gas control system and requires proper pilot flame impingement on the thermopile for reliable ignition and operation.
The FV44i utilizes a sophisticated control system, often operated via a remote control, allowing for adjustable heat output. Understanding the components – burner, pilot assembly, gas valve, thermopile, and venting system – is crucial for effective maintenance and troubleshooting. The air shutter opening, typically set at 1/8 inch, regulates air flow for optimal combustion.
This insert is designed for indoor use and requires a complete Glass Frame assembly (HA-58-00029) for glass replacement, including all necessary gaskets and the steel frame.
Installation Procedures
Proper installation is vital for safe and efficient operation. This section details gas line sizing, direct venting, pilot flame adjustment, and air shutter configuration.
Gas Line Installation & Sizing
Gas line installation requires strict adherence to local codes and manufacturer specifications. Always check for gas leaks after any connection – this is paramount for safety. The Mendota FV44i demands appropriately sized gas lines to deliver consistent pressure and volume, ensuring optimal burner performance.
Consult the manual for BTU input requirements and corresponding pipe sizing charts. Undersized lines can cause reduced heating output and potential burner issues; Utilize approved gas piping materials and fittings, and employ a qualified technician for all gas line work.
Properly seal all connections with gas-rated pipe dope or Teflon tape. Before lighting the appliance, perform a thorough leak test using a soap solution. Bubbles indicate a leak that must be addressed immediately. Failure to follow these guidelines could result in hazardous conditions.
Direct Venting Requirements
The Mendota FV44i is designed as a direct vent appliance, meaning it draws combustion air from outside and exhausts flue gases directly outdoors. This system enhances efficiency and indoor air quality. Proper venting is critical for safe and reliable operation.
The vent system must be installed according to the manufacturer’s instructions and local codes. Use only approved vent components specifically designed for gas fireplaces. Ensure the vent pipe maintains a consistent diameter and slope, avoiding sharp bends or obstructions.
Inspect the vent system annually for blockages or damage. Any safety screen or guard removed for servicing must be replaced before operating the appliance. Incorrect venting can lead to carbon monoxide buildup, a potentially fatal hazard.
Pilot Flame Adjustment
Proper pilot flame adjustment is essential for safe and efficient operation of the Mendota FV44i. The pilot flame must impinge directly on the thermopile to generate sufficient voltage for the gas valve. A weak or improperly directed flame can cause intermittent operation or failure to ignite.
To adjust the pilot flame, locate the pilot adjustment screw, typically near the gas valve. Slowly turn the screw until the flame is strong, blue, and engulfs the thermopile. The burner must light IMMEDIATELY, with the flame traveling promptly around the curve and lighting the burner.
Ensure proper pilot flame impingement on both the thermopile and the burner. An air shutter opening of 1/8 inch is generally recommended. Caution: Incorrect adjustment can create a safety hazard.
Air Shutter Adjustment
The air shutter controls the amount of air mixed with the gas, influencing flame characteristics and combustion efficiency. Adjusting the air shutter is crucial for achieving a clean, efficient burn and minimizing carbon buildup.
Locate the air shutter on the burner assembly. Slowly open or close the shutter to observe the flame. A properly adjusted flame will be blue with minimal yellow tipping. Excessive yellow indicates insufficient air, while a flickering or noisy flame suggests too much air.
Start with a 1/8 inch opening as a baseline. Fine-tune the shutter until the flame is stable, clean-burning, and produces optimal heat output. Important: Always observe the flame for rollout or sooting after adjustment.

Operating Instructions
This section provides detailed guidance on safely starting, operating, and monitoring your Mendota FV44i fireplace. Learn about flame characteristics and remote control functions.
Initial Startup Procedure
Before the first use, a thorough inspection is crucial. Ensure the gas supply is correctly connected and that there are no leaks – install proper size gas lines and check for leaks, as the manual emphasizes.
Turn the gas valve to the “Pilot” position. Press and hold the pilot button while simultaneously igniting the pilot flame. The burner must light immediately, and the flame should travel promptly around the curve to light the burner.
Verify proper pilot flame impingement on the thermopile and burner. If the pilot light doesn’t stay lit, repeat the lighting procedure. If it persistently fails, consult the troubleshooting section. Once the pilot is stable, turn the control knob to the “On” position to initiate the main burner. Observe the flame for proper operation.
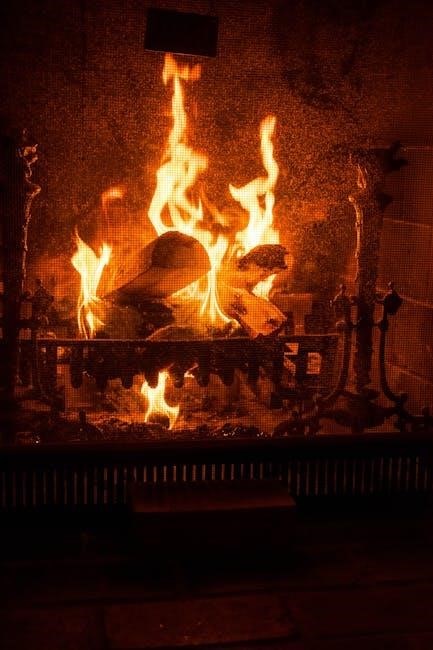
Flame Characteristics & Observation
A healthy Mendota FV44i flame should exhibit a vibrant, blue appearance with well-defined flame patterns. Observe the flame for consistent height and even distribution across the log set. Any signs of yellow tipping or flickering may indicate improper air shutter adjustment or insufficient gas pressure.

Regularly inspect for flame rollout, which is a dangerous condition. If rollout occurs, immediately turn off the gas supply and consult the troubleshooting section. Any safety screen or guard removed for servicing must be replaced before operating this appliance.
Ensure the flame is fully engaging the burner and logs. A lazy or sluggish flame suggests a potential issue with the gas supply or venting system. Consistent monitoring of flame characteristics is vital for safe and efficient operation.
Remote Control Operation
The Mendota FV44i remote control allows convenient adjustment of flame height and fan speed. Ensure the remote has fresh batteries for optimal performance. To operate, point the remote directly at the fireplace receiver, typically located near the control valve.
The remote features buttons for power on/off, flame height adjustment (high, medium, low), and fan control (on, auto, off). Adjusting heat output is easily achieved through the flame height settings. Familiarize yourself with the remote’s functions before initial use.
If the remote becomes unresponsive, check the battery compartment and ensure proper battery installation. Refer to the troubleshooting section for further assistance with remote control issues.
Adjusting Heat Output
Controlling the heat output of your Mendota FV44i is straightforward, utilizing both the remote control and manual controls. The primary method involves adjusting the flame height – higher flames equate to greater heat production, while lower flames provide a more moderate warmth.
Using the remote, cycle through the high, medium, and low flame settings to achieve your desired temperature. Flame characteristics & observation will help you visually gauge the heat level. Alternatively, manual adjustments can be made directly on the control valve, though remote operation is generally preferred for convenience.
Remember that external factors, such as room size and insulation, will influence the perceived heat output. Experiment with different settings to find the optimal comfort level for your space.
Maintenance & Service
Regular maintenance ensures optimal performance and safety of your Mendota FV44i. This includes routine cleaning, log set care, and periodic inspections of key components like the thermopile.
Routine Cleaning Procedures
Maintaining a clean Mendota FV44i fireplace is crucial for safe and efficient operation. Before any cleaning, always ensure the unit is completely cool and the gas supply is shut off. Begin by carefully removing the glass frame assembly – remember, replacement should involve ordering the complete unit (HA-58-00029) as per manufacturer guidelines.
Use a non-abrasive glass cleaner specifically designed for fireplace glass to avoid scratching. Gently wipe down the glass, removing any soot or residue. Inspect the burner and logs for debris, carefully vacuuming away dust and particles. Any safety screen or guard removed for servicing must be replaced before operating the appliance.
Pay attention to the venting system, visually checking for obstructions. Do not use water to clean any part of the control system or gas controls if they have been submerged in water. Regular cleaning, performed at least twice annually, will contribute to the longevity and performance of your Mendota FV44i.
Log Set Maintenance
Proper log set maintenance ensures realistic flame patterns and safe operation of your Mendota FV44i fireplace. Periodically inspect the ceramic fiber logs for cracks or damage; replace any compromised logs immediately to prevent soot buildup or irregular flame characteristics. Avoid handling the logs directly with bare hands, as skin oils can cause discoloration.
When repositioning logs (if necessary), refer to the original log placement diagram found within the installation manual (85-03-01060-F_FV44I_DECOR_INSTALLATION_AND_OPERATING_INSTRUCTIONS). Ensure proper spacing between logs to allow for adequate airflow and complete combustion. The burner must light immediately, with the flame traveling promptly around the curve and lighting the burner.
Do not attempt to clean the logs with abrasive cleaners. Gentle dusting with a soft brush is sufficient. Maintaining the integrity of the log set is vital for optimal performance and a visually appealing fire.
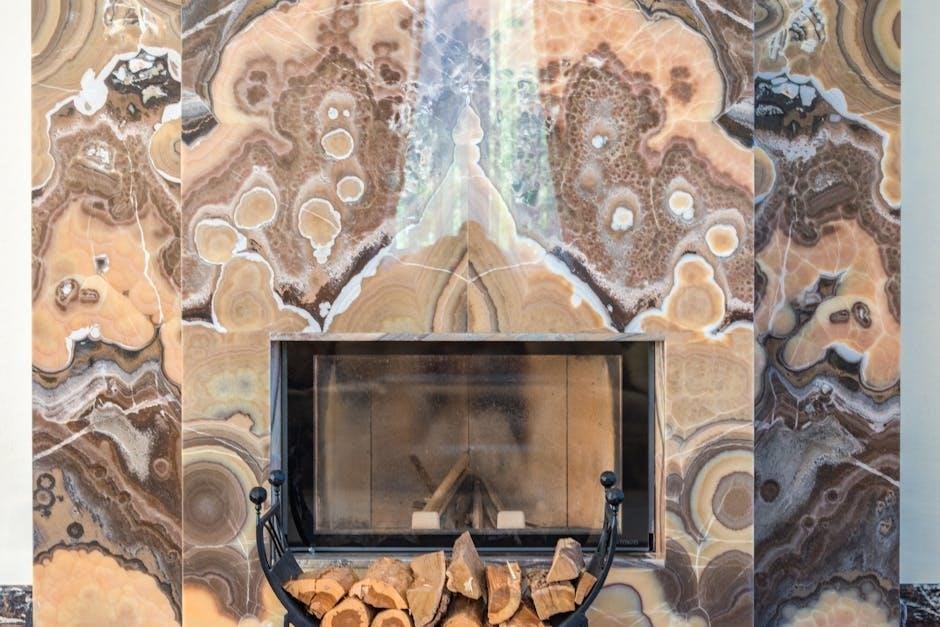
Glass Frame Replacement
Replacing the glass frame on your Mendota FV44i requires careful attention to ensure a proper seal and safe operation. It is crucial to order the complete Glass Frame assembly (HA-58-00029) as individual components are not available for separate purchase. This assembly includes all necessary gaskets, the glass itself, and the steel frame.
Any safety screen or guard removed for servicing must be replaced before operating this appliance. Disconnect the gas supply before beginning the replacement process. Carefully remove the old frame, noting the gasket placement. Install the new frame, ensuring the gasket is seated correctly to prevent gas leakage.
Glass replacement is to be done by a qualified technician. Do not use abrasive cleaners on the glass. A clean glass viewing area is essential for enjoying the fireplace’s aesthetic and monitoring flame characteristics.
Thermopile Inspection & Adjustment
The thermopile is a critical component of the Mendota FV44i’s safety system, generating the millivolts needed to operate the gas valve. Regular inspection is vital for reliable operation. Ensure proper pilot flame impingement on the thermopile; this is key to generating sufficient voltage.
A weak signal can prevent the valve from opening or cause intermittent operation. To inspect, use a millivolt meter to check the output while the pilot is lit. Adjust the pilot flame if necessary to maximize the millivolt reading.
Proper pilot flame impingement on the thermopile and burner is essential. If adjustments don’t resolve the issue, the thermopile may need replacement. Always consult a qualified technician for thermopile replacement and adjustments.
Troubleshooting Common Issues
This section addresses pilot light problems, flame rollout, gas leak detection, and interpreting error codes for the Mendota FV44i fireplace insert.
Pilot Light Troubleshooting
A consistently failing pilot light often indicates a problem with gas supply or the thermopile. First, ensure the gas valve is fully open and check for adequate gas pressure. The pilot flame must light immediately and travel promptly around the burner curve, igniting it fully.
If the pilot won’t stay lit, verify proper pilot flame impingement on the thermopile; this is crucial for generating sufficient voltage. Adjust the pilot flame if necessary, ensuring it’s strong and stable. Check the air shutter opening – a setting of 1/8 inch is often optimal.
A dirty or faulty thermopile can also cause issues. Inspect and clean the thermopile, or consider replacement if damaged. Always check for gas leaks after any adjustments or repairs. If problems persist, consult a qualified technician.
Flame Rollout Issues
Flame rollout, where flames extend beyond the designated burner area, is a serious safety concern. Immediately turn off the gas supply and investigate the cause. Common culprits include improper gas pressure, incorrect air shutter adjustment, or obstructions within the venting system.
Verify the venting system is clear of debris and properly installed, adhering to direct venting requirements. An improperly sized vent can contribute to rollout. The air shutter controls the air-to-gas mixture; adjusting it can stabilize the flame pattern.
Ensure the log set is correctly positioned, as misplacement can disrupt airflow. Any safety screen or guard removed for servicing must be replaced before operation. If the issue persists after these checks, contact a qualified service technician for a thorough inspection and repair.
Gas Leak Detection
Detecting gas leaks is paramount for safety. If you smell gas, immediately extinguish all open flames, avoid operating any electrical switches, and evacuate the premises. Do not attempt to locate the leak yourself. From a safe location, call your gas company or emergency services.
Install proper size gas lines and check for gas leaks during and after installation. A soapy water solution applied to gas connections will reveal bubbles indicating a leak. Never use a flame to search for leaks!
Regularly inspect gas lines and connections for corrosion or damage. DO NOT USE the appliance if any part has been under water, as this can compromise gas line integrity. If a leak is suspected, professional inspection and repair are essential before resuming operation.
Error Code Interpretation
The Mendota FV44i utilizes an error code system to diagnose operational issues. These codes, displayed on the remote control or control panel, pinpoint specific problems within the system. Refer to the comprehensive error code table within this manual for detailed explanations.
Common error codes may indicate issues with the thermopile, pilot flame, gas supply, or venting system. Proper pilot flame impingement on the thermopile is crucial; an error may signal insufficient heat reaching the sensor.
Attempting repairs based solely on error codes without proper training is discouraged. Contact a qualified technician for diagnosis and repair. Ignoring error codes can lead to unsafe operation or further damage to the appliance. Always document the error code before contacting service.
Parts & Warranty Information
Genuine Mendota replacement parts are essential for maintaining performance and safety. The complete glass frame assembly (HA-58-00029) is required for glass replacement, and warranty details are included.
Replacement Parts List
Maintaining your Mendota FV44i requires access to genuine replacement parts. This list provides a starting point, but always consult the full parts diagram in the official installation and operating instructions manual.
Critical components include the glass frame assembly (HA-58-00029), which must be ordered as a complete unit, encompassing all gaskets, glass, and the steel frame.
Other frequently replaced items may include the thermopile, pilot assembly components, gas control valves, and various burner parts. Always disconnect the gas supply before attempting any repair or replacement.
Ensure proper sealing and connections to prevent gas leaks. Refer to the manual for specific part numbers and detailed instructions. Improper parts or installation can void the warranty and create a safety hazard. Contact a qualified technician for assistance if needed.
Mendota Warranty Qualification
Your Mendota FV44i fireplace is covered by a manufacturer’s warranty, but qualification depends on several factors. Proper installation, adhering strictly to the provided instructions, is paramount.
Any deviation from these guidelines may invalidate the warranty.
The unit must be installed by a qualified technician and operated with natural gas or propane, as specified during purchase. Proof of purchase and the installation date are required for any warranty claim.
Furthermore, the appliance must not have been subjected to misuse, abuse, or acts of God (e.g., flooding). Do not operate if any part has been under water. Regular maintenance, as outlined in this manual, is also a condition of warranty coverage.
Service Reference Form
To expedite service for your Mendota FV44i, please complete this form and have it readily available when contacting a qualified technician or Mendota’s customer support. Include the model number (FV44i-PF2), the date of installation, and a detailed description of the issue.
Record any error codes displayed on the control system, as these provide valuable diagnostic information. Note the gas type (natural gas or propane) and the serial number of the unit. Any safety screen or guard removed for servicing must be replaced before operating this appliance.
Provide your contact information, including phone number and email address, for efficient communication. A clear description of the problem will help ensure a prompt and accurate resolution.
Water Damage Considerations
The Mendota FV44i gas fireplace is susceptible to damage if exposed to water. DO NOT USE this appliance if any part has been under water, as this can compromise the gas control system and electrical components, creating a safety hazard.
Water intrusion can lead to corrosion, malfunction, and potential gas leaks. If water exposure occurs, immediately shut off the gas supply and contact a qualified technician for inspection and repair. Replacement of affected parts, including the control system, may be necessary.
Ensure the surrounding area is dry before attempting to restart the unit. Proper venting and a dry installation environment are crucial for preventing water damage and maintaining safe operation.