Daikin Controller Manual: A Comprehensive Guide
Daikin air conditioning systems, including Perfera and Siesta models, require proper controller operation․ Recent discussions from 2020-2026 highlight issues
with U4 error codes, installation quality, and Enea Bonus Casa COP/EER code input for models like 2MXM50A2V1B9․ This guide provides essential information․
Understanding Your Daikin Controller
Daikin controllers are the central interface for managing your air conditioning system, offering precise control over temperature, fan speed, and operational modes․ These controllers, as evidenced by user experiences from late 2022 through 2026, are crucial for optimal performance and energy efficiency․ Understanding the controller’s functions is key to resolving common issues, such as the frequently reported U4 error code, and maximizing comfort․
Controllers range from simple, wired units to sophisticated wireless options, each designed for ease of use․ Proper installation, as noted in discussions regarding Perfera models (FTXM35R) and general system setup, is paramount․ Users have reported challenges with installation impacting controller functionality․ Familiarizing yourself with the controller’s layout and features will empower you to troubleshoot minor problems and effectively utilize advanced settings like timers and auto mode, especially when dealing with Enea Bonus Casa requirements and COP/EER code input for models like 2MXM50A2V1B9․
Types of Daikin Controllers
Daikin offers a diverse range of controllers to suit various needs and system configurations․ Primarily, these fall into two categories: wired and wireless․ Wired controllers provide a direct connection to the indoor unit, often offering a more comprehensive display and feature set․ Wireless controllers, gaining popularity as seen in recent Perfera (FTXM35R) installations from 2025, prioritize convenience and flexibility, allowing remote operation within a certain range․
Beyond these core types, specific models like those found in the Siesta series may have unique controller designs․ Discussions from 2023 and 2024 highlight the importance of controller compatibility with the unit, particularly when addressing issues like error codes (e․g․, U4) and ensuring proper operation for energy efficiency programs like Enea Bonus Casa, which require accurate COP/EER code input for models such as 2MXM50A2V1B9․ Choosing the right controller enhances user experience and system performance․
Wired Controllers: Features and Benefits
Daikin wired controllers offer a robust and reliable control solution for your air conditioning system․ These controllers typically feature a detailed display providing comprehensive information, including set temperature, operating mode, fan speed, and error codes – crucial for troubleshooting issues like the U4 code reported in 2015․ They often include advanced functions like timer programming for scheduled operation and precise temperature adjustments․
A key benefit is their direct connection, ensuring consistent communication with the indoor unit, unlike potential range limitations with wireless options․ While installations from 2025 increasingly favor wireless convenience, wired controllers remain preferred for complex systems or users prioritizing detailed control․ They are particularly useful when claiming energy efficiency incentives like Enea Bonus Casa, requiring accurate system data for models like 2MXM50A2V1B9, and ensuring optimal performance of units like the Perfera and Siesta series․
Wireless Controllers: Convenience and Functionality
Daikin wireless controllers prioritize user convenience, offering remote operation of your air conditioning system without the constraints of wiring․ These controllers, increasingly popular since 2023, provide essential functions like temperature adjustment, mode selection (cooling, heating, auto, dry), and fan speed control․ They are particularly appealing for newer installations, such as the Perfera models installed in 2025, where aesthetic considerations are paramount․
However, users should be mindful of potential range limitations, as reported in discussions regarding signal strength․ Maintaining clear line-of-sight and avoiding obstructions is crucial․ While generally reliable, wireless controllers may require occasional battery replacement․ When utilizing energy incentive programs like Enea Bonus Casa with models like 2MXM50A2V1B9, ensure the controller accurately reflects system operation, and be prepared to troubleshoot potential connectivity issues, avoiding errors like the U4 code․
Initial Setup and Pairing
Proper initial setup is crucial for seamless Daikin controller operation․ For wired controllers, this typically involves verifying correct wiring connections during installation, often performed by qualified technicians as highlighted in recent discussions (2020-2026)․ Wireless controller setup, however, necessitates a pairing process to synchronize with the indoor unit․ This is particularly relevant for newer models like the Perfera series installed in 2025․
The pairing procedure usually involves specific button combinations on both the controller and the indoor unit․ Refer to your model’s specific manual – crucial for models like 2MXM50A2V1B9 when claiming incentives like Enea Bonus Casa – to avoid issues․ Ensure a stable power supply during pairing․ If encountering difficulties, consult troubleshooting resources, as reported issues sometimes relate to signal interference or incorrect sequence execution, potentially triggering error codes like U4․
Pairing a Wireless Controller to Your Daikin Unit
Successfully pairing your wireless Daikin controller is vital for remote operation․ Begin by ensuring the indoor unit has power and is in pairing mode – consult your model’s manual (especially important for Perfera units installed in 2025)․ Typically, this involves pressing a specific button on the indoor unit for a designated duration․ Simultaneously, initiate pairing mode on the remote controller, often by holding down the ‘Set’ or ‘Pair’ button․
The units should then communicate, indicated by a signal or confirmation on the indoor unit’s display․ If pairing fails, ensure the controller has fresh batteries and is within close proximity to the indoor unit․ Issues can arise from interference or incorrect button sequences, potentially leading to a non-responsive controller․ Remember, proper pairing is essential for utilizing advanced features and avoiding error codes, like the frequently mentioned U4, and for accurate data input for programs like Enea Bonus Casa (model 2MXM50A2V1B9)․
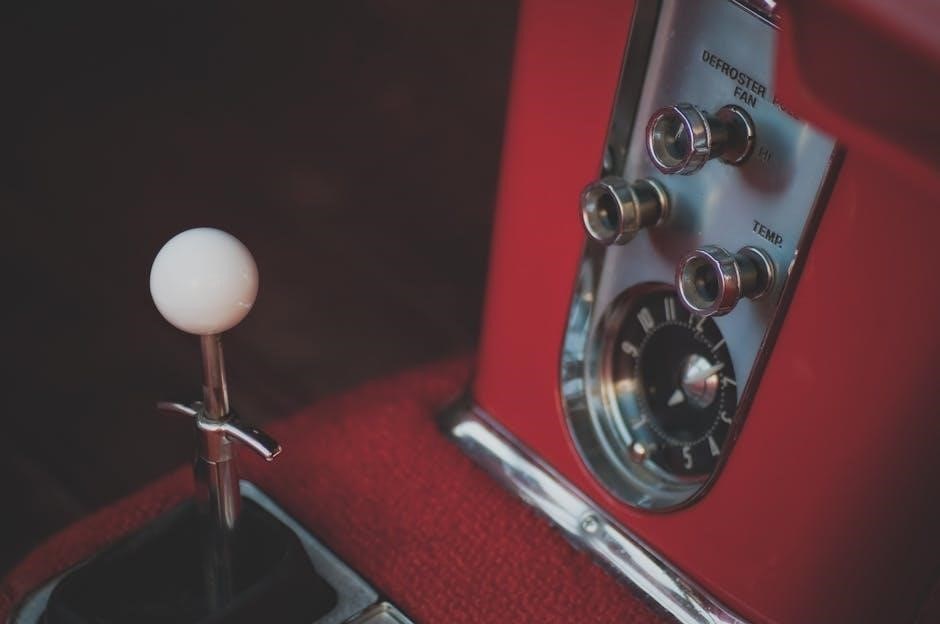
Controller Display Overview
The Daikin controller display provides crucial information regarding your air conditioning system’s operation․ Common elements include the set temperature, current room temperature, operating mode (cooling, heating, auto, dry), fan speed, and timer status․ Icons indicate specific functions, such as energy-saving mode or filter cleaning reminders․ Understanding these displays is key to efficient use, particularly with newer models like the Perfera FTXM35R installed in 2023․
Pay attention to error codes displayed; a frequently reported issue is the U4 code, requiring troubleshooting․ The display also shows timer settings, allowing for scheduled operation․ For models involved in energy efficiency programs like Enea Bonus Casa (2MXM50A2V1B9), the display might reflect energy consumption data․ Familiarizing yourself with the display layout ensures optimal control and quick identification of potential problems, avoiding unnecessary service calls․
Decoding the Icons and Symbols
Daikin controller displays utilize various icons and symbols to communicate system status efficiently․ A snowflake icon signifies cooling mode, while a flame represents heating․ Fan speed is often indicated by graduated lines, with more lines denoting higher speeds․ A timer icon confirms scheduled operation is active, crucial for models installed in 2025․ The Perfera series (FTXM35R) may have unique icons for features like intelligent eye or economy mode․
Error codes, such as the frequently mentioned U4 code, are displayed as alphanumeric combinations, requiring reference to a troubleshooting guide․ Symbols related to filter status alert users to cleaning needs․ When claiming energy incentives like Enea Bonus Casa (2MXM50A2V1B9), understanding icons related to energy efficiency is vital․ Correctly interpreting these symbols ensures optimal performance and proactive maintenance of your Daikin unit․
Basic Operation: Cooling Mode
Daikin air conditioners excel in cooling, initiated by selecting the snowflake icon on your controller․ Once activated, the system begins lowering the room temperature․ Users can adjust the desired temperature using the up and down arrow buttons, typically displayed in Celsius or Fahrenheit; Models like the Perfera FTXM35R, installed as recently as 2025, offer precise temperature control․
Fan speed is adjustable within cooling mode, influencing airflow and comfort․ Remember to consider energy efficiency when selecting fan speeds․ Troubleshooting discussions from 2015 and 2024 often mention ensuring proper installation for optimal cooling․ When utilizing features related to energy incentives like Enea Bonus Casa (2MXM50A2V1B9), efficient cooling is paramount․ Addressing potential issues like the U4 error code ensures consistent cooling performance․
Setting the Temperature in Cooling Mode
To set the desired temperature while in cooling mode, utilize the up and down arrow buttons on your Daikin controller․ The display will show the set temperature, typically ranging from 16°C to 30°C (or 60°F to 86°F)․ Recent user experiences with models like the Perfera FTXM35R (installed in 2025) highlight the responsiveness of these controls․
Ensure the set temperature is comfortable yet energy-efficient․ Lowering the temperature significantly increases energy consumption․ Discussions from 2023 emphasize the importance of proper installation for accurate temperature regulation․ When claiming benefits like Enea Bonus Casa (model 2MXM50A2V1B9), maintaining optimal cooling efficiency is crucial․ If experiencing issues, such as inconsistent cooling or error codes like U4, consult the troubleshooting section of this manual․

Basic Operation: Heating Mode
Switching to heating mode on your Daikin controller is typically achieved by pressing the “Mode” button until the heating icon appears on the display․ Similar to cooling, use the up and down arrow buttons to set your desired room temperature․ The range is generally the same as cooling – 16°C to 30°C (60°F to 86°F)․ User feedback from 2025 regarding Perfera installations suggests a quick response to temperature adjustments;
Proper installation, as noted in discussions from 2024, is vital for efficient heating․ If you’re utilizing the system for Enea Bonus Casa incentives (like with model 2MXM50A2V1B9), ensure optimal performance․ Should you encounter issues, such as insufficient heating or error codes (including the U4 code reported in 2015), refer to the troubleshooting section․ Remember to check for proper airflow and filter cleanliness․
Setting the Temperature in Heating Mode
To precisely set the temperature in heating mode, utilize the up and down arrow buttons on your Daikin controller․ The display will show your selected temperature, typically ranging from 16°C to 30°C (60°F to 86°F)․ Remember that achieving the desired temperature relies on a correctly installed system, as highlighted in user experiences from 2020-2025 with models like the FTXM35N5V1B․
Consider the room size and insulation when choosing a temperature․ Discussions from 2023 suggest some users experience inconsistencies, potentially linked to sensor issues․ If you’re claiming Enea Bonus Casa benefits with a unit like 2MXM50A2V1B9, accurate temperature control is crucial for demonstrating efficiency․ If the system isn’t heating adequately, or displays a U4 error, consult the troubleshooting guide before contacting a technician․
Advanced Features: Fan Speed Control
Daikin controllers offer multiple fan speed settings – typically Auto, Low, Medium, High, and sometimes a dedicated Quiet mode․ Adjusting fan speed impacts both comfort and energy consumption․ Auto mode intelligently adjusts the fan based on the temperature difference, while manual settings provide personalized control․ User feedback from 2023-2025 indicates that proper fan speed selection is vital for optimal comfort, especially with Perfera models like FTXM35R․
Higher fan speeds distribute air more rapidly but consume more energy․ Lower speeds are quieter and more energy-efficient; Ensure the fan isn’t set too low in heating mode, as this can hinder effective heat distribution․ If experiencing issues, remember installation quality, as noted in discussions, impacts performance․ For models claiming Enea Bonus Casa incentives (like 2MXM50A2V1B9), efficient operation is key․
Adjusting Fan Speed for Optimal Comfort
Achieving optimal comfort with your Daikin unit involves fine-tuning the fan speed․ Start with Auto mode to allow the system to self-regulate․ If drafts are noticeable, reduce the fan speed to Low or Medium․ Conversely, if the room feels unevenly heated or cooled, increase the fan speed․ Remember, higher speeds consume more energy, so balance comfort with efficiency․
Recent user experiences (2023-2025) with Perfera models highlight the importance of avoiding excessively low fan speeds in heating mode, as this can impede heat circulation․ For units like FTXM35R, experiment to find the sweet spot․ Proper installation, as frequently discussed, is crucial for consistent performance․ When claiming incentives like Enea Bonus Casa with models such as 2MXM50A2V1B9, efficient operation is paramount․
Advanced Features: Mode Selection (Auto, Dry, etc․)
Daikin controllers offer various modes beyond basic cooling and heating․ “Auto” mode intelligently switches between these based on room temperature․ “Dry” mode reduces humidity without significant cooling – ideal for damp climates․ Explore other modes like “Jet” for rapid temperature adjustment, or “Comfort” for quieter operation․ Understanding these modes maximizes efficiency and comfort․
User feedback (2023-2025) suggests the “Auto” mode on Perfera units, like the FTXM35R, can sometimes be overly sensitive․ The “Dry” mode is frequently recommended for preventing mold growth․ When applying for incentives like Enea Bonus Casa (model 2MXM50A2V1B9), demonstrating efficient mode usage can be beneficial․ Remember, proper installation is key for all modes to function correctly, as noted in recent discussions․
Utilizing Different Modes for Specific Needs
Daikin controllers empower users to tailor their climate control․ For quick cooling or heating, utilize “Jet” mode, but be mindful of increased energy consumption․ “Dry” mode excels in humid environments, preventing discomfort and mold․ “Auto” mode provides convenient, hands-free operation, adjusting settings based on room conditions․ The “Fan” mode simply circulates air, useful without temperature change․
Recent user experiences (2023-2025) with Perfera models highlight the effectiveness of “Dry” mode․ Discussions also mention potential issues with the “Auto” mode’s sensitivity․ When claiming benefits like Enea Bonus Casa (model 2MXM50A2V1B9), demonstrating optimized mode selection can support your application․ Proper installation, as emphasized in several reports, ensures each mode functions as intended, maximizing efficiency and comfort․
Advanced Features: Timer Functions

Daikin controllers offer robust timer functionalities for scheduled operation․ Users can set “On” timers to automatically activate the unit at a specific time, and “Off” timers to halt operation․ These features promote energy savings and ensure comfort upon arrival or before sleep․ Some models allow daily or weekly scheduling, providing maximum flexibility․
Discussions from 2022-2025 regarding Perfera installations emphasize the benefit of timers for managing energy costs․ Properly configured timers can also contribute to qualifying for incentives like the Enea Bonus Casa program (model 2MXM50A2V1B9)․ Ensure accurate time settings and review the controller manual for specific programming instructions․ Consistent use of timer functions enhances convenience and optimizes energy efficiency within your Daikin system․

Setting Timers for Scheduled Operation
To set timers on your Daikin controller, navigate to the timer function within the menu․ Typically, you’ll be prompted to select between “On” and “Off” timers, and then input the desired start time and days of the week for activation․ Some Perfera models (like FTXM35R, installed in 2023-2025) offer multiple timer settings for customized schedules․
Remember to confirm the current time is accurately set on the controller․ Discussions from late 2022 highlight the importance of precise timer programming for energy savings and qualifying for programs like Enea Bonus Casa (model 2MXM50A2V1B9)․ Refer to your specific controller manual for detailed instructions, as menu options may vary․ Properly configured timers ensure your Daikin unit operates efficiently and conveniently․
Troubleshooting Common Issues
Several common issues can arise with Daikin controllers․ A frequently reported problem, dating back to 2015 and continuing through 2024, is the U4 error code, often appearing after 10-30 minutes of operation․ Another concern, noted in 2023, involves seemingly illogical sensor behavior․ If your controller isn’t responding, check the batteries (for wireless models) and ensure proper pairing with the unit․
Remote control range issues can occur; ensure no obstructions interfere with the signal․ Installation quality is crucial – problems reported in 2020-2025 suggest poor installation can lead to recurring issues․ For Perfera models, and when claiming Enea Bonus Casa benefits (model 2MXM50A2V1B9), accurate error code reporting is vital for support and potential rebates․
Error Codes and Their Meanings (U4 Code)

The U4 error code on Daikin air conditioning units, frequently discussed since 2015 and persisting into 2024, is a common issue reported by users․ It typically manifests after approximately 10 to 30 minutes of operation․ While the precise cause isn’t always clear, it often indicates a communication problem between the indoor and outdoor units․ Some speculate it relates to sensor malfunctions, though this isn’t definitively confirmed․
Troubleshooting involves checking connections and ensuring proper refrigerant levels․ Users have noted that a faulty installation can exacerbate the problem, highlighting the importance of professional setup․ For models like the Perfera FTXM35R, and during processes like claiming Enea Bonus Casa rebates, accurately documenting the U4 code is crucial for service requests․
Controller Not Responding
If your Daikin controller fails to respond, several factors could be at play․ First, verify battery levels, especially for wireless models – a common oversight․ Check for obstructions between the controller and the indoor unit, as signal interference can occur․ Ensure the unit isn’t switched off at the main power supply or via a circuit breaker․ Recent user reports (2023-2025) suggest installation quality impacts responsiveness․
For Perfera and Siesta models, confirm the controller is correctly paired with the unit․ If issues persist, a reset of both the controller and the air conditioner might be necessary․ Documenting the problem is vital when contacting support, particularly when dealing with Enea Bonus Casa installations or models like 2MXM50A2V1B9․
Remote Control Range Issues
Reduced range with your Daikin remote controller is a frequently reported concern, particularly with wireless models․ Obstructions like walls, furniture, and even human bodies can significantly limit the signal․ Ensure a clear line of sight between the controller and the indoor unit’s receiver․ Battery strength is crucial; low batteries drastically reduce transmission power․
Interference from other electronic devices can also contribute to range problems․ Users of Perfera (FTXM35R) and Siesta units have noted that installation location impacts performance․ If issues persist, try moving closer to the unit or replacing the batteries․ When discussing problems with installers or support, especially regarding Enea Bonus Casa installations (2MXM50A2V1B9), detail the distance and obstructions․
Maintenance and Care
Proper Daikin controller maintenance ensures longevity and reliable operation․ Regularly clean the controller surface with a soft, dry cloth to remove dust and grime․ Avoid using abrasive cleaners or solvents, as these can damage the display and buttons․ For wireless controllers, periodic battery replacement is essential; low batteries can cause erratic behavior or complete failure․
Inspect the battery compartment for corrosion and clean if necessary․ Users of models like the Perfera (FTXM35R) and Siesta should pay attention to this, especially after extended use․ Proper installation, as discussed in recent forums (2020-2026), impacts overall system health, including controller responsiveness․ Maintaining the controller contributes to efficient operation and avoids issues related to Enea Bonus Casa (2MXM50A2V1B9) installations․
Cleaning Your Daikin Controller
Maintaining a clean Daikin controller is crucial for optimal performance and hygiene․ Begin by switching off the unit and removing any batteries, especially for wireless models like those used with Perfera (FTXM35R) and Siesta systems․ Use a soft, dry microfiber cloth to gently wipe the controller’s surface, removing dust, fingerprints, and smudges․
Avoid applying excessive pressure, which could damage the display or buttons․ Do not use liquid cleaners, abrasive materials, or solvents, as these can cause irreversible harm․ For stubborn dirt, lightly dampen the cloth with water and wring it out thoroughly before wiping․ Ensure the controller is completely dry before reinserting the batteries and resuming operation․ Regular cleaning, as emphasized in discussions from 2020-2026, supports reliable function and avoids issues related to Enea Bonus Casa (2MXM50A2V1B9) installations․
Battery Replacement (Wireless Controllers)
Wireless Daikin controllers, commonly paired with Perfera (FTXM35R) and other models, require periodic battery replacement to maintain functionality․ When the controller displays a low battery indicator, or ceases to respond, it’s time for new batteries․ Typically, these controllers utilize AAA or AA alkaline batteries – consult your specific model’s documentation for confirmation․
Carefully open the battery compartment, usually located on the back of the controller․ Remove the old batteries, noting the correct polarity (+ and -)․ Insert the new batteries, ensuring proper alignment․ Close the battery compartment securely․ After replacement, you may need to re-pair the controller with your Daikin unit, as discussed in online forums from 2020-2026․ Proper battery maintenance is vital, especially when dealing with Enea Bonus Casa (2MXM50A2V1B9) installations and avoiding error codes like U4․
Daikin Perfera Series Controller Specifics (FTXM35R)
The Daikin Perfera FTXM35R model, popular since 2023, utilizes a specific controller often discussed in online forums (2020-2026)․ Users have reported issues with its operation, sometimes linked to installation quality or sensor accuracy․ The controller allows for standard functions like temperature setting, fan speed adjustment, and mode selection (cooling, heating, auto, dry)․
A common concern revolves around potential “absurd” logic in its operation, as noted by users․ Troubleshooting often involves checking for error codes, such as the U4 code, and ensuring proper pairing after battery replacement․ When claiming Enea Bonus Casa incentives for this model (potentially linked to 2MXM50A2V1B9 codes), accurate controller function is crucial․ Always refer to the official Daikin manual for detailed instructions and specific settings for the FTXM35R․
Daikin Siesta Model Controller Information
The Daikin Siesta model, mentioned in discussions from 2025, presents unique controller considerations․ Users have inquired about its specific functionality and whether it differs significantly from other Daikin series․ Proper installation is paramount, as issues can stem from inadequate setup rather than controller malfunction itself․ Like other models, the Siesta controller manages cooling, heating, fan speed, and operational modes․
Online forums (2020-2026) suggest that understanding the controller’s logic is key to avoiding perceived “absurd” behavior․ While specific error codes like U4 haven’t been prominently linked to the Siesta, general troubleshooting steps apply․ When applying for incentives like Enea Bonus Casa, ensure the controller operates correctly to avoid complications with COP/EER code validation․ Refer to the official Daikin documentation for detailed guidance on the Siesta controller․

Enea Bonus Casa & COP/EER Codes (2MXM50A2V1B9)
When claiming the Enea Bonus Casa incentive for a Daikin unit – specifically model 2MXM50A2V1B9 – accurate COP (Coefficient of Performance) and EER (Energy Efficiency Ratio) codes are crucial․ Discussions from 2025 highlight user difficulties in locating and inputting these codes correctly․ These values demonstrate the unit’s energy efficiency and are required for incentive approval․
Ensure the controller is functioning optimally, as incorrect readings can lead to rejected applications․ Verify the codes against official Daikin documentation or consult with your installer․ Proper installation, as emphasized in forums from 2020-2026, impacts performance and therefore, the reported COP/EER values․ Double-check the entered data before submission to avoid delays or denials of your Enea Bonus Casa claim․ Accurate controller operation is key to a smooth process․