
Welcome to the comprehensive guide for DSI installation instructions, covering a wide range of products from Nintendo DSi to columns, turnstiles, and telemetry systems. This resource provides clear, step-by-step directions to ensure smooth and successful installations, catering to both beginners and experienced users. Explore detailed preparation steps, troubleshooting tips, and best practices for various DSI products, all designed to simplify your setup process.
Overview of DSI Installation Guides
DSI installation guides provide comprehensive instructions for setting up various products, including Nintendo DSi consoles, turnstiles, columns, and telemetry systems. These guides cover preparation, tools, and step-by-step processes to ensure smooth installations. They include troubleshooting tips, safety precautions, and best practices to help users avoid common mistakes. Whether you’re installing homebrew applications on a Nintendo DSi or setting up an ES9000 optical turnstile, DSI guides offer detailed diagrams and clear instructions. Designed for both newcomers and experienced users, these resources aim to simplify complex tasks and ensure compliance with manufacturer standards. Additional support materials, like videos and PDF manuals, are often available for further assistance.
Importance of Following Manufacturer Instructions
Adhering to DSI manufacturer instructions is crucial for successful installations, ensuring safety, compatibility, and optimal performance. Deviating from guidelines can lead to system malfunctions or damage. Proper following ensures compliance with warranty terms and industry standards, preventing voidance of coverage. Detailed steps and safety precautions outlined reduce risk of errors and potential hazards. Manufacturer instructions are tailored to specific products, providing precise requirements for tools and materials. They also highlight essential troubleshooting steps and maintenance tips, preventing costly repairs. By following instructions closely, users achieve professional-grade results, ensuring longevity and functionality of DSI products across various applications, from gaming systems to industrial equipment.
Preparation for DSI Installation
Proper preparation is essential for a seamless DSI installation experience. Begin by ensuring your system meets all compatibility and hardware requirements. For Nintendo DSi installations, check if Unlaunch is pre-installed or if an SD card is formatted correctly. Gather all necessary tools, such as screws, mounting blocks, and power tools, based on the specific DSI product. Review the manufacturer’s guidelines to understand safety precautions and assembly steps. Organize materials like pilaster bases or plastic wood blocks for structural installations. Ensure devices are updated with the latest firmware or software, as outdated versions may cause compatibility issues. Refer to installation videos or manuals for visual guidance, especially for complex setups like turnstiles or columns. This preparation ensures a smooth and error-free process.

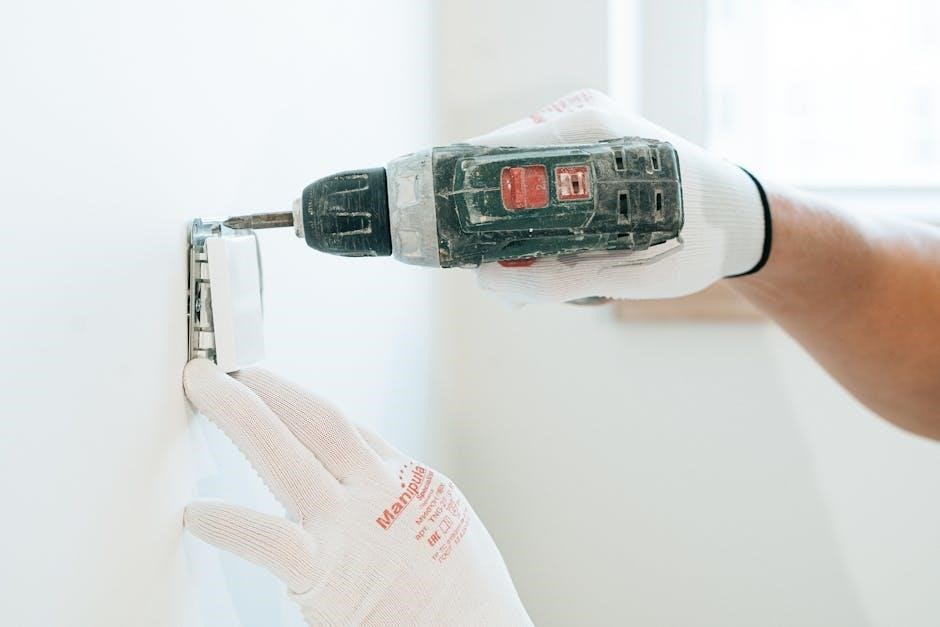
Nintendo DSi Installation Instructions
Install homebrew and DSiWare effortlessly on your Nintendo DSi. Format your SD card correctly, download necessary tools, and follow step-by-step guides for a smooth setup experience.
Downloading and Setting Up Homebrew
Downloading and setting up homebrew on your Nintendo DSi is essential for accessing a wide range of custom applications and games. Begin by ensuring your SD card is properly formatted to FAT32. Next, download the latest homebrew tools, such as the homebrew channel installer, from a trusted source. Extract the files to your SD card’s root directory. Ensure the folder structure is correct, with the necessary boot files in place. Power on your DSi, navigate to the settings menu, and enable the “Auto-Restart” feature. Insert the SD card, hold the correct button combination during startup to access the homebrew environment. Follow on-screen instructions to complete the setup. This process unlocks new possibilities for your DSi, allowing you to run homebrew applications and enhance your gaming experience. Always verify the compatibility of downloaded files with your DSi model to avoid any issues. By carefully following these steps, you can safely and effectively set up homebrew on your device.
SD Card Preparation and Formatting
Properly preparing and formatting your SD card is crucial for a smooth DSI installation process. Begin by formatting the card to FAT32 using a reliable tool like the official FAT32 format utility. Ensure the SD card has enough storage capacity for the files you plan to use. Create a folder structure on the root directory, typically including folders for homebrew applications and games. Be careful not to nest folders too deeply, as this can cause compatibility issues. If unsure about the correct folder structure, refer to the provided image for guidance. Always verify that your SD card is compatible with your DSI model before proceeding. This step ensures your device recognizes the card and runs applications without issues.
Running DSiWare and Homebrew Applications
After setting up your SD card, you can easily run DSiWare and homebrew applications on your Nintendo DSi. Insert the SD card into your console and power it on. Hold the specific buttons (usually L+R+A+B) to boot into the homebrew environment. Navigate through the menu to select the desired application or game. Ensure all files are correctly placed in their respective folders on the SD card. For DSiWare, you can launch titles directly from the SD card without needing a flashcard. This method also supports out-of-region and 3DS-exclusive DSiWare. Always verify file compatibility and format to avoid any issues during execution.
Boot Options and Button Configurations
To access boot options on your Nintendo DSi, hold specific buttons while turning it on. For homebrew, press and hold L+R+A+B to boot into the homebrew environment; This allows you to run custom applications and DSiWare directly from your SD card. You can also configure button mappings for a personalized experience. Additionally, holding certain buttons during startup can bypass the health safety screen or access Safe Mode. Ensure your SD card is properly formatted and contains the necessary files in the root directory. These configurations provide flexibility and convenience for running various applications on your DSi. Always refer to the manufacturer’s guidelines for optimal results.
Troubleshooting Common Issues
When encountering issues during DSI installation or operation, start by checking the SD card for proper formatting and file placement. Corrupted files or incorrect folder structures can prevent homebrew applications from launching. Ensure all files are in the root directory and not nested. If the DSi fails to boot into homebrew, verify that Unlaunch is correctly installed and configured. For SD card errors, reformat the card using the correct file system (FAT32) and reload the necessary files. If applications still don’t launch, check for button configuration mismatches during startup. Finally, if issues persist, reset the device or reinstall Unlaunch to restore functionality. Always follow manufacturer guidelines for troubleshooting.

DSI Turnstile Installation Guides
Discover step-by-step guides for installing DSI turnstiles, including the ES9000 Barrier Optical Turnstile. Learn about preparation, alignment, and calibration for seamless setup and optimal performance.
ES9000 Barrier Optical Turnstile Setup
The ES9000 Barrier Optical Turnstile setup involves several key steps to ensure proper installation and functionality. Begin by unpacking and inventorying all components, including sensors, barriers, and control units. Mount the turnstile base securely to the floor using the provided hardware, ensuring it is level and aligned with the surrounding area. Next, attach the barrier arms to the main unit, following the manufacturer’s torque specifications. Connect the sensors and ensure they are calibrated for accurate detection. Power up the system and test all functions, including entry and exit directions. Finally, integrate with access control systems if required and perform a final inspection to ensure smooth operation. Proper setup ensures reliability and safety in high-traffic environments.
Preparing for Turnstile Installation
Before installing the DSI ES9000 Barrier Optical Turnstile, ensure the site is prepared. Clear the installation area of debris and obstructions, and verify the floor is level and sturdy. Check the power supply and ensure all electrical connections meet local regulations. Align the turnstile with the entry/exit points and mark the installation area according to the manufacturer’s specifications. Unpack and inventory all components, verifying no parts are damaged or missing. Review the installation manual and ensure all tools are available. Conduct a final inspection of the site and components before proceeding with the installation. Proper preparation ensures a smooth and efficient setup process.
Step-by-Step Installation Process
Post-Installation Testing and Calibration
After completing the installation, perform thorough testing to ensure the DSI system functions correctly. Power on the device and run diagnostic tests to check for any malfunctions. Verify the alignment and accuracy of sensors and barriers, ensuring smooth operation. Calibrate the system according to the manufacturer’s instructions to optimize performance. Test all safety features and adjust settings as needed to meet specific requirements. Conduct a final inspection to confirm proper installation and functionality. Refer to the manual for detailed calibration steps and troubleshooting guidance to ensure the system operates efficiently and safely. Proper testing and calibration are crucial for maximizing the lifespan and reliability of the DSI product.
Maintenance and Cleaning Tips
Regular maintenance is essential to ensure the longevity and optimal performance of your DSI product. Clean surfaces with a soft cloth and mild detergent, avoiding harsh chemicals that may damage finishes; For electronic components, use a dry cloth to prevent moisture buildup. Lubricate moving parts periodically with silicone-based sprays to maintain smooth operation. Inspect for wear and tear, addressing issues promptly to prevent further damage. Store protective coverings on unused ports and connectors. Schedule annual professional inspections for complex systems like turnstiles or telemetry devices. By following these tips, you can extend the lifespan of your DSI product and ensure reliable functionality over time.

DSI Column Installation Instructions
DSI column installation requires precise preparation and alignment. Use specified materials and tools for secure mounting. Ensure stability by following manufacturer guidelines for optimal results and durability.
Plastic Wood Mounting Block Application
For DSI column installation, attach plastic wood mounting blocks flush with the column’s mounting surface and wall using provided screws. Ensure alignment is precise to avoid misfit. Properly secure the blocks to guarantee stability and even distribution of weight. Use the correct screw type as specified to prevent damage or loosening over time. Double-check alignment before tightening to ensure a flush fit. This step is critical for maintaining structural integrity and preventing future issues. Follow manufacturer guidelines for torque and screw placement to achieve optimal results.
Pilaster Base Installation Steps
Begin by positioning the pilaster base at the desired location, ensuring it is level and aligned with the wall. Secure the base using the provided screws, making sure they are tightly fastened to prevent any movement. Next, attach the pilaster to the base, ensuring a snug fit. Double-check the alignment to maintain structural integrity. Use a level tool to confirm everything is properly aligned. Tighten all connections firmly to ensure stability. Follow the manufacturer’s instructions for screw placement and torque specifications. This step is crucial for a secure and durable installation. Proper installation ensures the pilaster remains stable and functions as intended.
Securing Columns to the Wall
Start by marking the wall where the column will be secured, ensuring it is level and properly aligned. Attach the plastic wood mounting blocks to the wall using the provided screws, making sure they are flush with the surface. Position the column over the blocks and secure it tightly using the screws. Double-check the alignment to ensure stability. Tighten all connections firmly to prevent any movement. Follow the manufacturer’s guidelines for screw placement and torque specifications. Properly securing the column to the wall is essential for safety and durability. This step ensures the column remains stable and functions as intended over time.
Tools and Materials Required
For a successful DSI column installation, gather the necessary tools and materials. Essential tools include a drill, screwdriver, measuring tape, and level. Ensure you have the provided screws, plastic wood mounting blocks, and pilaster base. Additional materials like wall anchors or brackets may be needed, depending on the wall type. A spirit level is crucial for proper alignment. Use a pencil to mark screw positions accurately. Double-check the hardware kit for completeness before starting. Organize all materials to streamline the installation process. Refer to the manufacturer’s list for specific requirements. Having everything ready ensures a smooth and efficient installation experience. Proper preparation avoids delays and ensures a secure setup;
Common Mistakes to Avoid
When installing DSI columns, avoid common mistakes to ensure stability and durability. One major error is using incorrect screws, such as flat-head instead of pan-head screws, which can compromise the hold. Misaligning the mounting blocks or pilaster base can lead to uneven columns. Neglecting to properly secure the blocks to the wall increases the risk of detachment. Over-tightening screws may damage the material, while under-tightening can result in instability. Failing to follow the manufacturer’s instructions precisely can void the warranty or weaken the structure. Always double-check measurements and alignments before finalizing the installation. Proper preparation and attention to detail are key to achieving professional results.

DSI Railing and Decking Installation
DSI railing and decking installations require precise alignment and secure fastening. Ensure stair railings are properly assembled and swivel mounts are adjusted for optimal stability. Always follow safety guidelines and manufacturer instructions to guarantee durability and compliance. Properly install tie-down brackets and decking materials to achieve a safe and visually appealing setup. Regular inspections and maintenance are crucial for long-term reliability and performance.
Stair Railing Installation Process
Begin by identifying the top and bottom stair rails, ensuring proper alignment. Lay the bottom rail beside the stairs and mark the post locations. Secure the posts using the recommended screws, ensuring stability. Attach the top rail to the posts, aligning it with the bottom rail. Use swivel mounts for adjustable connections, tightening them firmly. Double-check all connections for strength and durability. Ensure the railing meets safety standards and is visually appealing. Regular inspections and maintenance are essential for long-term reliability. Follow manufacturer instructions for specific hardware and adjustments to guarantee a safe and secure installation. Proper installation ensures both functionality and aesthetic appeal. Always prioritize safety and compliance.
Swivel Mount Setup and Adjustment
Start by attaching the swivel mount to the post, ensuring it is level and securely fastened. Align the railing with the mount, adjusting the angle to match the stair pitch. Tighten the screws firmly to maintain stability. For optimal flexibility, adjust the swivel mount to accommodate any uneven surfaces or unique stair configurations. Periodically inspect the mount for loose connections and tighten as needed. Proper alignment ensures smooth operation and longevity of the railing system. Follow manufacturer guidelines for specific torque values and adjustment techniques. Regular maintenance will prevent wear and tear, ensuring the swivel mount remains reliable over time. Always test the stability after adjustments to guarantee safety and durability.
Decking Installation Best Practices
Begin by assessing the site and ensuring all materials are compatible with the decking system. Prepare the area by clearing debris and leveling the ground. Always check decking boards for damage before installation and acclimate them to the environment. Use proper ventilation techniques to prevent moisture buildup. Follow safety guidelines, including wearing protective gear and using correct lifting methods. Adhere strictly to manufacturer instructions for spacing, fasteners, and alignment. Measure twice and cut once to ensure precise fits. Secure decking boards firmly to the frame using recommended fasteners. Test the structure’s stability after installation and perform regular maintenance to uphold durability and safety standards.
Ensuring Safety and Compliance
Always prioritize safety by wearing appropriate protective gear, including gloves and safety glasses, during installation. Ensure the site is clear of hazards and well-ventilated. Follow local building codes and regulations to guarantee compliance. Verify that all materials meet industry standards and are compatible with the system. Conduct regular inspections of tools and equipment to maintain functionality. Keep loose clothing and long hair tied back to avoid accidents. Never overload the structure beyond its specified capacity. Post-installation, test the system under controlled conditions to ensure stability and performance. Refer to manufacturer guidelines for specific safety protocols and adhere strictly to them throughout the process. Compliance ensures both safety and durability of the installation.

Tie Down Bracket Installation
Begin by identifying the correct location for the tie-down bracket, ensuring it aligns with the structure’s anchor points. Mark the surface with a pencil to guide accurate placement. Drill pilot holes to avoid material damage and insert wall anchors if necessary. Secure the bracket using the provided screws, tightening firmly but avoiding overtightening. Double-check alignment and stability before proceeding. For additional support, consider adding secondary brackets at intervals recommended by the manufacturer. Ensure all connections are snug and even to distribute weight evenly. Test the bracket’s hold by applying gentle pressure, then progressively increase force to confirm reliability. Proper installation ensures the bracket withstands expected loads without compromising structural integrity. Follow these steps for a robust and secure setup.

DSI Telemetry System Setup
Begin with the Ponemah software setup for data collection and analysis. Install the implantable telemetry hardware, ensuring proper placement and connections. Calibrate the system carefully for accurate readings and reliable performance. Follow the manufacturer’s guidelines to avoid errors and ensure optimal functionality. This setup process is crucial for collecting precise physiological data and maintaining system integrity. Proper installation and calibration ensure seamless operation and accurate results, making it essential to adhere to the provided instructions.
Implantable Telemetry Hardware Overview
The DSI implantable telemetry hardware is designed for precise physiological data collection in research settings. Key components include small, lightweight transmitters and receivers, ensuring minimal impact on subjects. The system integrates seamlessly with the Ponemah software platform, enabling real-time data acquisition and analysis. PhysioTel transmitters are surgically implanted and offer high-resolution measurements of parameters like blood pressure, temperature, and activity. Advanced signal processing ensures accurate and reliable data transmission. The hardware is built for durability, with biocompatible materials and long-lasting battery life. Proper implantation and calibration are critical for optimal performance. This system is widely used in scientific research for its accuracy and ease of use. Always follow manufacturer guidelines for installation and maintenance to ensure data integrity and system longevity.
Getting Started with Ponemah Software
Getting started with Ponemah software involves downloading and installing the program from the DSI website. Follow the installation wizard to ensure all components are correctly set up. After installation, launch the software and configure your DSI telemetry system by connecting the hardware and setting up necessary parameters. The software allows you to create and manage studies, collect data, and analyze results. Familiarize yourself with the interface, including tools for data visualization and reporting. For detailed guidance, refer to the Ponemah user manual or online tutorials. Troubleshooting tips are also available to address common issues during setup. Ponemah is designed to streamline data collection, making it user-friendly for both novice and experienced researchers.
Calibrating the DSI System
Calibrating the DSI system is essential for ensuring accurate data collection and optimal performance. Begin by powering on the system and accessing the calibration menu through the software interface. Follow the on-screen instructions to initiate the calibration process, which may involve adjusting sensors or aligning components. Proper calibration ensures precise measurements and reliable operation. If the system has been moved or its installation disturbed, recalibration is necessary. Refer to the Ponemah software guide for detailed steps, and ensure all environmental factors, such as temperature and humidity, are stable during the process. Regular recalibration helps maintain system accuracy and prevents data inconsistencies.
Troubleshooting Telemetry Issues
Troubleshooting telemetry issues begins with identifying common problems such as signal loss or data inaccuracies. Ensure all connections are secure and restart the system if necessary. If issues persist, check for firmware or software updates, as outdated versions may cause malfunctions. Recalibration may be required if the system has been moved or disturbed. Consult the Ponemah software guide for detailed troubleshooting steps and solutions. Additionally, verify that environmental factors, such as interference from other devices, are not affecting performance. Regular system maintenance and updates can help prevent telemetry issues and ensure reliable data collection and transmission.
System Maintenance and Updates
Regular system maintenance is crucial for ensuring optimal performance and reliability of DSI telemetry systems. Schedule periodic checks to update firmware and software, as newer versions often include bug fixes and enhancements. Clean sensors and transmitters to avoid data interference and ensure accurate readings. Additionally, verify that all connections are secure and free from corrosion. Always back up data before performing updates to prevent loss. Refer to the manufacturer’s guidelines for specific maintenance schedules and procedures. By staying proactive with system updates and care, you can extend the lifespan of your DSI equipment and maintain precise data collection capabilities.
General DSI Product Resources
Access comprehensive resources, including product warranties, installation videos, and downloadable PDF manuals. Utilize customer support for assistance and ensure compliance with manufacturer guidelines for optimal performance.
DSI Product Warranty Information
DSI products are backed by a limited warranty, ensuring coverage for manufacturing defects and materials under normal use. Typically, warranties last for one year from purchase date.
Key points include repair or replacement of defective items at no cost; Registration may be required for warranty activation.
Exclusions apply for misuse, improper installation, or third-party alterations. For detailed terms, refer to the official warranty document or contact DSI support.
This warranty underscores DSI’s commitment to quality and customer satisfaction, providing peace of mind for your investments in their products.
Accessing DSI Installation Videos
DSI offers a library of installation videos designed to guide users through setup processes step-by-step. These videos cover various products, from columns to turnstiles and telemetry systems.
Access them via the official DSI website or partner platforms like YouTube. Each video provides expert tips and troubleshooting insights, making installations easier.
Whether you’re a professional or a first-time installer, these resources ensure a smooth experience. Start by visiting the DSI website and navigating to the support section for video links.
This visual guidance complements written manuals, offering a comprehensive solution for successful product deployment.
Downloading PDF Manuals and Guides
DSI provides downloadable PDF manuals and guides for various products, ensuring easy access to detailed instructions. Visit the official DSI website and navigate to the support section.
Here, you’ll find a repository of PDF documents covering installation steps, troubleshooting, and product specifications. These manuals are organized by product type, making it simple to locate the specific guide you need.
For convenience, some guides are also available through third-party platforms. Ensure you download the latest versions to stay updated with the most accurate information.
These PDF resources are indispensable for successful installations, offering clear visuals and comprehensive instructions.
DSI Customer Support and Assistance
DSI offers comprehensive customer support to assist with installations, troubleshooting, and general inquiries.
Reach their team via phone at 800-446-7659 or fax at 866-509-5099 for direct assistance.
Visit their official website at www.diggerspecialties.com for detailed resources, including manuals and guides.
Additionally, DSI provides email and live chat support for convenient access to experts.
Their dedicated team is available to address installation challenges, clarify instructions, and ensure a smooth experience.
Whether you’re a professional or a first-time installer, DSI’s customer support is designed to provide timely and effective solutions, ensuring your project’s success.